Showing posts with label vegan. Show all posts

Friday, June 25, 2010

Salsa & Beans! Tortillas & Rice!

This week I got promoted from “We’re assessing your abilities as a copy editor” to “You’re a copy editor!” I’m stoked that I’m an official employee, but there is a bit of uncertainty because my shifts revolve more around gaps in the schedule than they did before. At first I let that bother me, but then I remembered my horoscope, having read it in Metro on the way to work. It said something about how there would be some unexpected changes in my life on that day, but that it would only be a problem if I let it be. (Really, it’s not a horoscope at all, but it is solid advice to live by.)

And in talking to some of my coworkers, I’ve been assured that there are plenty of people going on vacation who I will be able to cover for.

But in food news: I made some fantastic Mexican-like food (I’m hesitant to call it straight Mexican because who am I to declare such authenticity?).

First: the Tortillas.

I love this recipe for tortillas from Homesick Texan. She has tonnes of great Tex-Mex recipes on her website, and plenty of them are easily turned vegetarian. While I’ve made a couple different tortilla recipes, this one is great because it uses a miniscule 2 teaspoons of oil, as opposed to 5 tbsp of shortening like the recipe in the Rebar cookbook. (Side note: does anyone else have the Rebar cookbook? I haven’t used it in a while because they have so many fancy ingredients, but it really does have good stuff in it. Next on the to-buy list: The Coup cookbook!)

Monday, October 26, 2009

Snacking on the cheap

I really do like potato chips: salty and crispy Lays, crunchy and vinegary Miss Vickies, home-baked and toothsome sweet potato chips. Satisfying and indulgent for my savoury tastebuds – and they tend to bully the sweet-loving ‘buds into submission.

White Gold
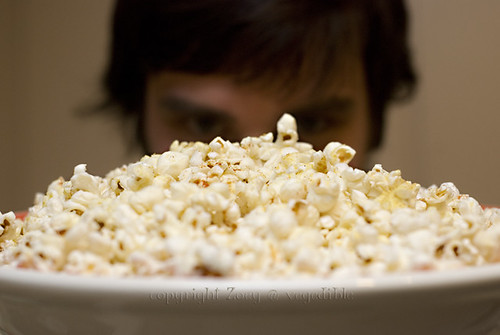
Popcorn as modeled by Bri.

However, as you’re probably aware, chips are just not particularly nutritional, nor particularly cheap. And homemade ones take a lot of effort, even if you have a fancy mandolin to slice ‘em them tantalizingly thin.

Homemade popcorn, on the other hand, is cheap. Compare a $3.50 bag of chips, or a $6 box of microwavable, chemical-laden corn to a simple $2-$3 bag of unadulterated, whole-grain popping corn! Plus, some places (Superstore) sell it in bulk, which is sometimes even cheaper. It shows up on Canada’s Food Guide to Healthy Eating because it’s high in fibre and iron, low in calories and there’s no sodium or sugar at all…until you spice it up!

Here’s my take on stove-top popcorn.

Hot and Tasty Popcorn
Makes 2 perfectly generous servings

  • Generous 1/3 cup popcorn kernels
  • 3 tbsp canola or other vegetable oil
  • 1-2 tbsp nutritional yeast
  • ¼ - ½ tsp lemon pepper seasoning
  • ¼ - ½ tsp paprika, or cayenne if you like it hot

  1. Set a 2-quart (1.89 L) lidded pot on stove. Add oil and turn heat to med-high. Immediately add popcorn and shake to distribute the kernels across the bottom of pan. Cover lid and gently shake back and forth to roll the kernels in the oil. Don’t lift the lid of the pot as you will let the heat out which could result in your popcorn burning before it can pop, or never getting hot enough to pop. Don't let the pan or oil heat up before adding the popcorn, or you will just burn stuff. I've been there. Repeatedly.
  2. Stop shaking the pot for a couple of minutes, until the popping starts. Then, continue to gently shake the pot, with your hand on the lid if necessary. If you were a bit generous with the popcorn, or if you used a smaller pot, then you may need to dump some of the popcorn into the serving bowl so it doesn’t topple all over the stove.
  3. Dump about half of the popped popcorn into your large bowl. Sprinkle half of the nutritional yeast on top, and repeat with the lemon pepper and paprika or cayenne. Shake your bowl or use a spoon to distribute the seasonings further. Pour the rest of the popped popcorn to fill bowl, and repeat the seasoning process.
Enjoy!

Of course, you can skip the nooch if you don’t have any, and just use whatever seasonings you’ve got. Other options from the spice cabinet include: curry powder, mustard powder, dill weed, pepper, sea salt, Tabasco sauce (makes it a bit soggy though).

Saturday, October 10, 2009

Day 4, eating on $30/week

It's damn cold in Calgary right now. Here is a list of things I am interested in doing tomorrow:
  1. making pie
  2. roasting sweet potatoes
  3. eating bread
  4. drinking tea
  5. eating stuffing
  6. drinking wine
Perhaps in that order, but any other order would do as well. Here is a list of things I ought to do tomorrow:
  1. the dishes
  2. the "take-home" portion of my "theory" "midterm" (note the sarcasm-laden quotation marks)
  3. study for another theory midterm
  4. my laundry
  5. sweep the kitchen (I'll probably actually do that one)
We shall see how it all goes. I would probably be less concerned with the weather if I were wearing my slippers


Challah Risingchallah all poofyfresh challah

Wednesday, September 9, 2009

Biscuits of Love

This recipe is adapted from The Joy of Cooking's Buttermilk Biscuits & Rolled Biscuits recipes.

The Biscuits of Love


Biscuits of Love

  • 1-3/4 cups all purpose flour
  • 2 tsp baking powder
  • 1/2 tsp baking soda
  • 1/2 tsp salt
  • 1-3 tbsp fresh dill
  • about 5 tbsp chilled butter or shortening, cut into 2 cm x 2 cm blocks
  • 3/4 soy milk
  • 2 tsp vinegar
  1. Preheat oven to 450 F.
  2. Mix together flour, baking powder, baking soda, dill and salt.
  3. Cut in butter or shortening with 2 knives (crossed like scissors) until they become small pea-sized balls.
  4. Mix vinegar into soy milk. It will curdle - this is your vegan buttermilk.
  5. Make a well in centre of dry ingredients and pour in milk mixture.
  6. Stir with a big wooden spoon just until the mixture starts to pull away from the sides of the bowl. Turn dough onto lightly floured cutting board or counter (if your counter tops aren't as old and decrepit as mine). Knead gently 8-10 times.
  7. Roll out dough with floured rolling pin to about 1/2 an inch thick.
  8. Cut with a floured cookie cutter (obviously I used a heart-shaped one), and place biscuits on an ungreased baking sheet.
  9. Re-roll dough scraps as necessary and repeat #8.
  10. Bake for about 12 minutes, or until lightly browned.
These turned out really well although I slightly over baked the first pan. Awesome with a dot of butter and hot pepper jelly or any kind of jam...or plain...or with a fried egg on top. Just so good!

Friday, July 24, 2009

Weekly Roundup


I guess I am still trying to figure out some sort of a schedule for little bloggy here. Ideally I'd update daily, but I haven't set aside the time yet. Which in turn leads to posts such as this one which will be photo heavy and retrospective.

On to the show!

This past week saw Summer peek her sweaty, sunburnt brow from behind the clouds for the first time of the year. Temperatures were toeing the
torrid line of 30 degrees Celsius (86 F) and the ultralow humidity of this prairie city turned downtown into an enormous and cruel sauna.

That meant minimal cooking for me as our apartment is not well equipped to deal with hot weather. I was tempted to bake biscuits and muffins but each sweaty time I opted instead to boil or panfry something tasty instead.

Exhibit A:
Thai Peanut Stirfry. Adapted from this Allrecipes.com "Best Thai Peanut Sauce" link
Here is my version:
  • 1/2 cup organic peanut butter (no sugar or other junk added) creamy or chunky
  • 1/3 cup coconut milk
  • 1 tbsp water
  • 1.5 tbsp lime juice
  • 1.5 tbsp soy sauce
  • 1.5 tsp sesame oil
  • 1.5 tsp hot sauce (I use Rooster Brand Chili Garlic Sauce)
  • .5 tsp ginger powder
  • 1.5 cloves garlic
Mix together in a bowl or shake in peanut butter jar, making sure all the peanut butter lumps are softened and mixed in. Let sit 30 minutes-1 hour to allow flavours to develop.

After that, it's completely versatile as far as starch, veg and protein. For this particular time, I made jasmine rice and Bribot stir-fried broccoli, cauliflower, cremini mushrooms and garlic. We pour our sauce onto the almost-cooked veg and let it thicken and cook for a bit before serving over rice. I think I may have gone a bit overboard with the coconut milk this time, because I was using up a can from earlier in the week. But it turned out amazing and very filling. Highly recommend you incorporate it in your repertoire.

The night after, we had gnocchi with jarred tomato-basil sauce. Very delicious and Bri was raving the whole time, and I was of course flattered because the man does eat a lot of pasta. Anyhow, it wasn't particularly filling so after dishes were done we decided to make movie snac
ks for during James Bond.

Exhibit B:
Vegan Cheezy Sauce "Fundue" with roasted potatos, mushrooms and pickles.

Honestly, the pickles were a bit weird but the sauce is just so good that it doesn't even matter. I usually make the Cheezy Sauce recipe (from the Veganomicon) but Bri offered to do it this time, and it was divine.

Here's our version of the nutritional yeast gravy:
  • 2 cups prepared veg broth
  • 1/4 cup spelt flour (AP flour is fine too)
  • 1 tbsp olive oil
  • 3 cloves garlic, minced
  • pinch of dried thyme
  • 1/4 tsp sea salt (depending on saltiness of veg broth)
  • fresh ground black pepper
  • 1 tsp turmeric
  • 3/4 cup nutritional yeast flakes (essential ingredient but we find it's still good if you only have 1/2 cup too)
  • 1 tbsp lemon juice
  • 1 tsp prepared mustard
  1. Whisk flour into broth in a measuring cup and the until big lumps are gone.
  2. Cook garlic in olice oil in small saucepan over medium-low heat about 2 minutes
  3. add thyme, salt and pepper and cook for a few seconds, then add broth turmeric and nutritional yeast and raise heat to medium. Stir constantly with whisk.
  4. It should thicken in about 3 minutes but just turn the heat up if it needs a bit longer
  5. After it had thickened, let cook for another couple minutes, then add lemon juice and mustard. Taste for saltiness, adjust as needed, then remove from heat and cover until you're ready to eat. Irresistable. Keeps well in the fridge for a few days.
If you're unfamiliar with nutritional yeast, this is the time to try it! It's a bit smoky and cheesy in flavour and is a wonderful addition to all sorts of sauces, or even just sprinkled inside a wrap. High in B12 also!

Okay, so this is getting long so I'll be brief with Exhibit C: Back of the Fridge Sushi! Yesterday's dinner earned its name due to the rapidly thrown together fillings I chose. I had my weekly sushi craving but wasn't up to spending $20 on typical boring veggie rolls so after tossing a frisbee with Bri, I set to work on a big batch of sushi.

Fillings included: dill pickles, cream cheese, pickled banana peppers, vine tomato, pepper relish, dijon-Vegenaise, salad greens and barbecue sauce-marinate tofu strips.


Dinner turned out quite tasty in the end but not as good as previous sushi nights at home because I messed up the rice a bit, it was overcooked with too much
moisture which made it tough to cute nicely and the rolls weren't as luscious as they could have been. On the bright side I actually rolled 3 whole regular maki (i.e. not inside out) and they all mostly stayed. Also experimented with some fat rolls, which turned out alright.

If you're interested in making sushi at home I suggest you read imakesushi.com and google some sushi rolling videos, that's how I got to this point. The price is so so much lower than
a restaurant and it's really not difficult once you've rolled a few.